Wednesday, July 31, 2013

Hoppy day!


We had to wait a day for Strider to get back into town, but now the excitement can begin.

We got bunnies!


Naming them was serious business.  An entire family meeting was devoted to the subject, followed by passionate votes.


In the end, Foo Foo and Honey Bun won.


When calm, they both love to be petted.  Foo Foo doesn't mind being held.  Honey Bun isn't a fan yet but she's learning to trust us.  Foo Foo loves me and if I just sit in the grass she'll nuzzle my arm or lay down next to me.


This is usually what Honey Bun tries to do around the kids :)


This is truly exciting and quite out of character for us.  But it's been such a fun experience!


Wednesday, July 24, 2013

Room by room - girls' room

It all hinged on the dresser.  With that done, we're ready to party!  Well, or sleep, actually.


It's a really miniature sized room, so the layout is limited.  The best configuration is to have the dressers near each other.


Here is the wall across from the bed, with a Christ picture from my dad and a tutu bow hanger from my friend Kristy.


When I say miniature, I'm not kidding.  This is the entry.


We used the same idea as their room in the last house, and hung their blessing dresses for decoration, this time with glass knobs from the set I bought for the dresser.  I'd like to add a photo on the wall of each of them on that special day.


 The bed was bought a couple weeks before we moved.  I was so happy to get a super sturdy and well built piece of furniture that will last forever.  It seriously is ridiculously heavy. I searched for a white double bed because I knew their room would be small.  I wanted them to share without doing bunks.  I paid $90 for the bed and frame and it's perfect.  The seller threw in the huge mirror over the new dresser for another $10.  I couldn't believe it.

The bedding itself was a total splurge.  I paid $80 and it's from Pottery Barn.  I bought it from a lady who spent $250 on it, put it on her daughter's bed, and then changed her mind.  Can you imagine doing such a thing?  Not this bargain shopper.  Anyway, I fell in love with it, and sold some things before we moved to pay for it.  I am so happy I got it.


I realized while taking pictures that Rosebud's dresser and the bed both have a lower scallop detail.  Cute!


Cost breakdown:

Bed $90
Bedding (comforter, 4 shams) $80
Bed skirt $12
Mirror $10
Dresser $30 + refurbish $50

I will add a couple more photos, and maybe a lamp if I can find one for cheap.

So, that's more than I spent anywhere else in the house, by far.  But it's a happy, girly place.  I'm not tied into emerald green carpet anymore, or a brown oak bed for my baby girls.  I wanted a special spot and I got it.  Plus, we've noticed something.  Since sharing a bed, the little cuties are closer than ever.  They stick up for each other and do more things together.  It has helped me to know we made the right choice.


And, as with any project, as soon as I get one spot done, 5 others get destroyed!  Ugh.


Monday, July 22, 2013

Dresser refurbish


I'm so pleased to bring you my latest bit of hard work.

A dresser for Princess.


This old yard sale dresser turned out to be a good size for the spot in the girls room where I needed the dresser to go.  It had seen decades of use, however, and needed some attention. 


I got it with the intention of sanding a little and painting it white.

When I sanded for over an hour and only got part of one drawer front tackled, I knew I should rethink my plan.  It turns out that the dresser had about 7 layers of gummy latex paint (in some pretty entertaining colors, I might add).  One treasure, about three layers down, even revealed a landscape motif with a little hand-painted dog and flowers and such.  


I decided to strip the wood of everything.


I like this gel.  You can use it indoors or out (I did both) because it doesn't have harmful fumes.


You brush it on pretty thickly and wait.  It bubbles up and the kids thought it was so cool.


Then take a scraper and... 


Voila!

At the bare wood I saw a trace of an earlier trim piece maybe?  I kept getting curious about its history.

The drawer fronts weren't too terrible.  One layer of gel, scrape, clean up the edges later with sandpaper.


The dresser shell was a different story.  Once I started on the top I was pretty nervous.  It was TOUGH as nails.  I really considered giving up at this point.


But I didn't.  I just kept gelling and scraping and sanding and scraping.


Finally scraped and stripped as much as I thought I could without going to the loony bin.


Here she is halfway through priming.


All total I did 3 coats of primer, 3 coats of paint, 2 coats of Polycrylic clear coat.


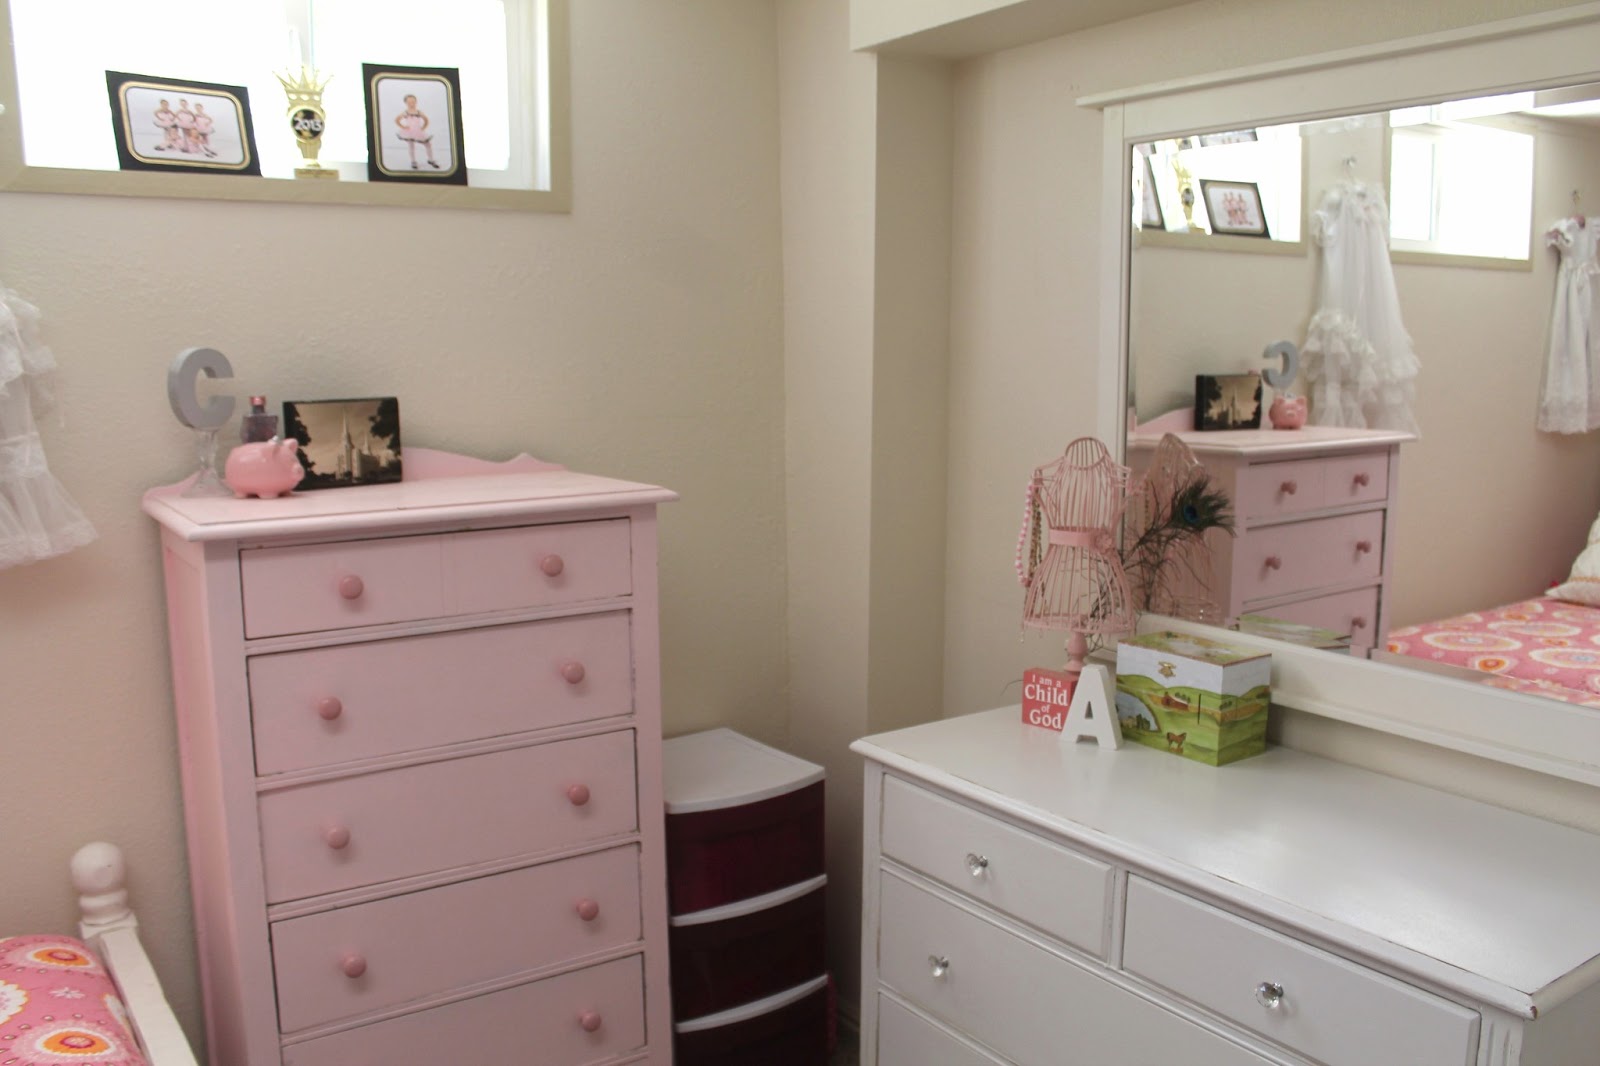
Here she is, with girly glass knobs, in all her glory!


Before the clear top coats I lightly distressed.  The girls' bed is the same way, so it made sense.


 LOVE


Edited to add:

Project details:

I used half a quart can of KILZ primer/stain blocker to prime.
I used two cans of Rustoleum 2X coverage white spray paint.
I used 80, 180 and 220 grit sandpaper for the different levels of work.  The fine stuff was used between every primer and paint layer.
I used 1/3 of a quart of Minwax Polycrylic
I got the knobs on eBay - set of 10 for $16.99.


Due to the mirror, here's a bit of a sneak peek to the girls' room.


For the complete room, read HERE.